

If you’ve been using Windows 11, you may already know that the operating system is partially bug-free. However, if you are running a Dev build of Windows 11, you will have more problems, such as the Start Menu not working, brightness control not working, sound not working, etc. Recently, we’ve got many emails from readers asking how to fix Windows 11 Brightness problems.
Users have complained that Windows 11’s brightness control does not work, preventing them from adjusting the screen’s brightness. In addition, some users have reported that the display brightness of Windows 11 fluctuates automatically. If you have a Windows 11 laptop and are experiencing the same problem, you are reading the correct information. This post will discuss some of the most effective and straightforward methods for resolving the Windows 11 Brightness issue.
How To Quickly Fix Brightness Control Not Working On Windows 11?
Be aware that our discussed methods are compatible with Windows 10 and prior Windows versions. Therefore, the same methods may be used to resolve the brightness control not working issue on all Windows versions. Let’s check out.
Update Display Driver
If the brightness control does not work on your Windows 11 computer, you must update the Display Driver first. Occasionally, the brightness control only functions owing to an out-of-date or flawed display driver. Hence, before attempting anything else, update that the Display Driver on your PC is up-to-date to easily fix the Windows 11 brightness control not working problem. Here are the procedures required to update the Display Driver.
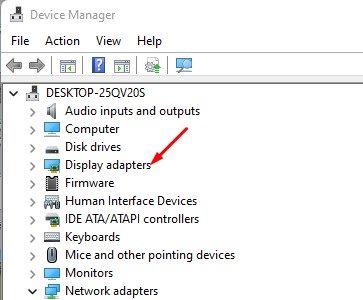
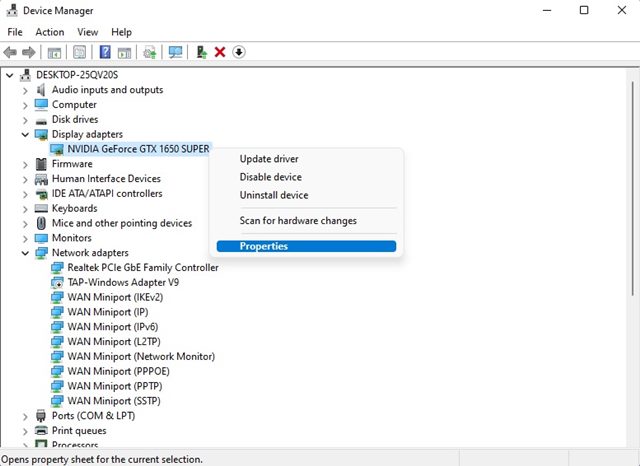
1 – Click the Windows 11 Search type and enter Device Manager.


2 – Expand the Display Adapters option in Device Manager.

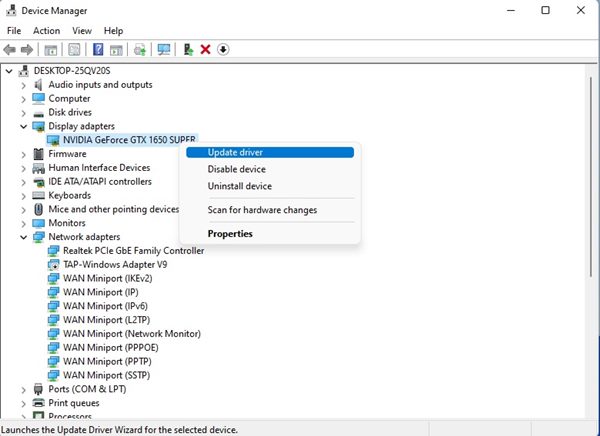
3 – Now, right-click on the GPU or display adapter that powers your display and choose Update Driver.

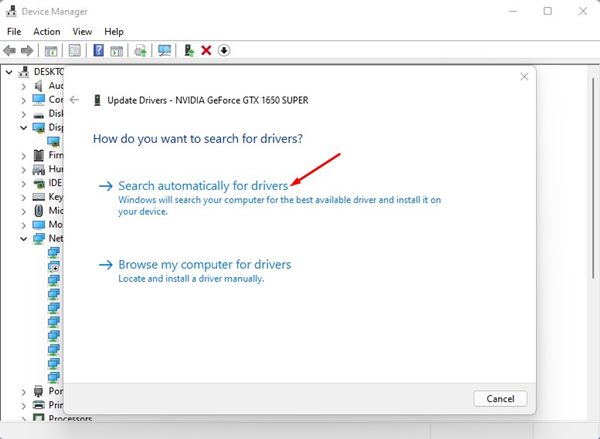
4 – Select Search automatically for updated driver software option in the following window.

That is all! You are done. Now Windows 11 will automatically look for available updates and install them on your device if it finds any.
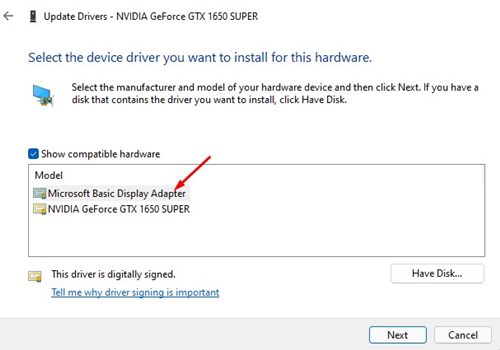
Use Microsoft’s Basic Display Adapter
Switching to Microsoft’s Basic Display Adapter has been reported by several users to resolve the Windows 11 brightness control not working issue. If Windows 11 and your display driver are incompatible, you will be unable to control the brightness.
1 – Click the Windows 11 Search type and enter Device Manager.
2 – In Device Manager, right-click the Display driver and choose Update Driver.
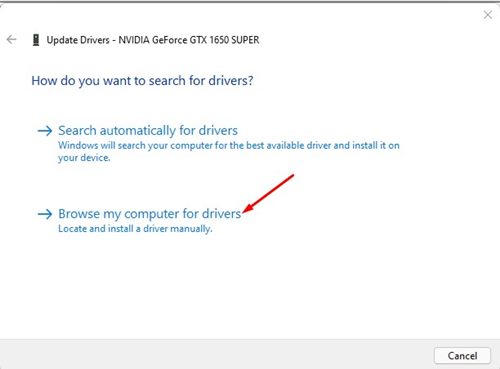
3 – Choose the option “Browse my computer for driver software” on the subsequent screen.

4 – On the subsequent screen, pick the option Allow me to choose from a list of device drivers on my computer and click Next.

5 – Choose Microsoft Basic Display Adapter and click the Next button on the Choose the device driver screen.

That is all! You are done. After making the adjustments mentioned above, restart the computer. This will most likely resolve the Windows 11 brightness control issue.
Rollback Display Driver To The Previous Version
If you have brightness control problems after installing a system update, you must roll back the Display Driver to the Previous version. It is rather simple to roll back display drivers to the earlier version of Windows 11’s operating system. To accomplish this, you must follow the easy procedures outlined below.
1 – Click the Windows 11 Search type and enter Device Manager.
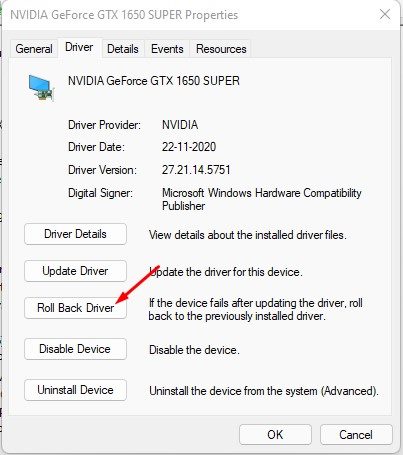
2 – In Device Manager, right-click the display adapter and choose Properties.

3 – Click the Roll back driver button in the Properties window (if available).

That is all! You are done. This is how to fix the Windows 11 brightness control not working problem on a laptop or desktop computer.
Run SFC Command
If none of the above solutions have resolved the brightness not working issue on Windows 11, you must use the SFC Command. Brightness control not working or users being unable to adjust the display’s brightness is frequently the consequence of a corrupted system file. The SFC or system file checker utility will detect and repair damaged system files and likely resolve any brightness-related issues on your computer. Here are the steps you must take.
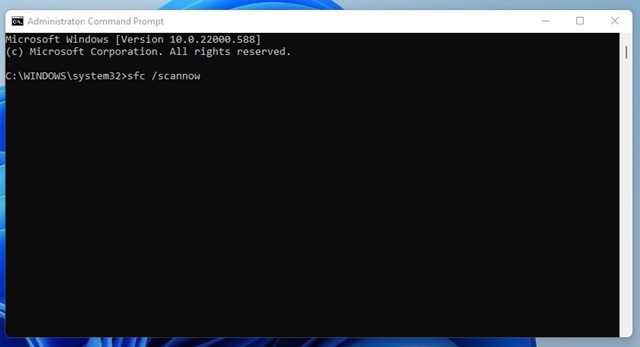

1 – Launch the Windows 11 search type and enter Command Prompt. Next, right-click the CMD icon and select the Run as administrator option.
2 – At the command prompt, enter sfc /scannow and press the Enter type.
3 – Now, wait till Windows 11’s scan is complete. Close the command prompt after completing the scan, then restart your PC.
That is all! You are done.
Conclusion:
Therefore, below are some easy solutions to the Windows 11 brightness control not working issue. I hope this post was helpful! Also, share with your friends.