Wi-Fi Router IP Address on iPhone, iPad, or Mac: Finding your router’s IP address on your iPhone, iPad, or Mac is easy. In just a few clicks, you will be ready to go.
Wi-Fi Router IP Address on iPhone, iPad, or Mac
Need to change the settings on your Wi-Fi router? Find the router’s IP address using your iPhone, iPad, or Mac.
You should know the IP address of your Wi-Fi router. For instance, if you’re going to change a few settings related to the operation of your router, you will need the router’s IP address to access the settings page.
Methods To Find Wi-Fi Router IP Address
One method for finding the router’s address is to look at the bottom of the device, where the default address will be printed alongside the MAC address and serial number. If your router is not easy to connect, someone may have changed the default address, making it easier to use.
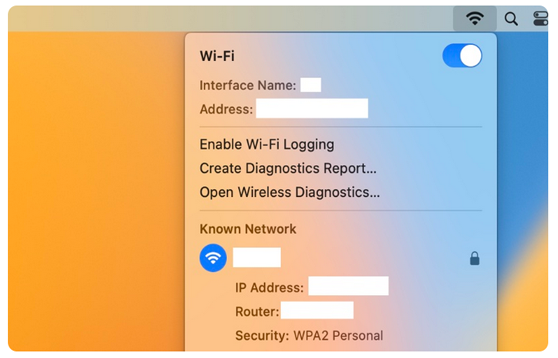
So, what are your current options? You can use your Mac, iPhone or iPad to find your router’s IP address. Assuming you are already connected to your Wi-Fi network, do the following on your Mac:
- Connect to your Wi-Fi network if you are not already. Pick the Wi-Fi icon in the menu bar, select your desired network, and join it.
- Hold down the Option key on the left side of your Mac’s keyboard.
- You will now see many options, and at the very top will be the IP address for your Wi-Fi network, followed by the router’s IP address.
You’ll find lots of helpful information here, such as the band you’re connected to, the wireless speed, channel, and noise level, among other things. This sort of information is not natively available on an iPhone or iPad.
Alright! Now that you know how to locate your router’s IP address on your Mac, here’s how to do the same on your iPhone or iPad.

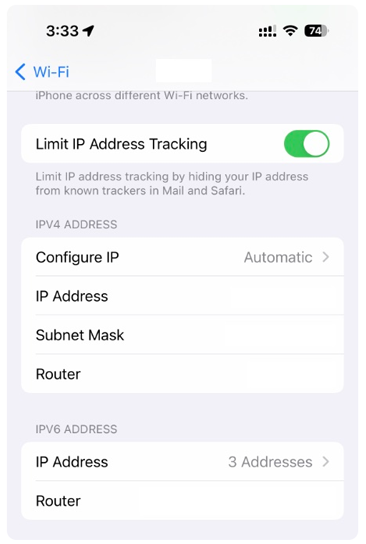
- Ensure that you are connected to your Wi-Fi router as usual. You can do this by navigating to Settings > Wi-Fi and selecting the desired network.
- When connected, tap the small “i” icon next to the Wi-Fi network’s name.
- Under the IPv4 and IPv6 sections, you will find your router’s IP address. You may not see the IPv6 section at all if IPv6 is disabled on your router or if your Internet service provider does not support it.

Once you have the router’s address, enter it into your web browser’s URL bar and press Enter. You will be taken to the router’s configuration page. Enter your login details, and you can begin customizing settings and adjusting.
Final Words
Remember that this information may not apply to certain Wi-Fi routers and mesh networks. For instance, navigating to the router’s address (if you have Nest or Google Wifi) will ask you to get the app on your mobile device. Someone trying to update anything on the network would have difficulty doing so due to the high security already in place. Alternatively, if you need to remember your Google account’s username and password, you are effectively kept out of your network when it comes to changing settings.
If you have a Wi-Fi router whose settings can be changed through a web browser, use a password that is extremely hard to figure out instead of the default “admin” password. The second recommendation is to change the default router address to something else. Change it, at least from the one mentioned under the router.


