

Do you enjoy viewing videos on YouTube? This is not a question you would ask someone in the present day. However, nearly everyone with a smartphone/computer and internet access watches between 5 and 10 YouTube videos daily. YouTube is a free platform that enables users to broadcast countless hours of video content. While YouTube is mostly bug-free, several factors may prohibit you from binge-watching your favorite shows. One such problem is YouTube Audio Stuttering in Chrome, which can negatively impact your video-viewing experience. If you are experiencing shaky or stuttering audio on YouTube, there is no need to fear since the problem may be resolved quickly.
How To Quickly Fix YouTube Audio Stuttering In Chrome On Windows?
Consequently, this post will fix some of the best methods for resolving the YouTube Audio Stuttering issue with the Chrome browser on Windows. So, let’s get started.
Mute Or Unmute Youtube Tab
Muting and unmuting the problematic YouTube tab might sometimes fix the problem. For example, you can mute and unmute a YouTube tab to remedy the audio stuttering issue.
1 – Launch your preferred web browser and navigate to YouTube.com.
2 – Open the video on the YouTube website. If the audio is stuttering, right-click the Tab and choose “Mute site” from the context option.
3 – To unmute the website, right-click the Tab and select Unmute website.
That is all! You are done. This is how to mute and unmute the YouTube tab in Chrome to fix the audio stuttering issue.
Restart YouTube
If the YouTube audio continues to stutter, you must restart YouTube. Occasionally, this problem is caused by faulty cache and cookies. It would be best if you thus continued your YouTube tab to build a fresh audio connection to fix the audio stuttering problem. Restart YouTube on the Chrome browser, and shut and reopen the Tab containing YouTube. You can restart your web browser to improve the likelihood of fixing the YouTube audio stuttering issue.
Try Playing YouTube Videos In A Different Browser
Even if you do not wish to use a web browser other than Chrome, it is recommended that you briefly switch web browsers and play a YouTube video. This can help you determine whether the problem is with YouTube or your web browser. Chrome is to blame if the audio stuttering on YouTube videos does not occur in other web browsers. Therefore, you must tackle browser-related issues to fix the YouTube audio stuttering issue.
Block Or Remove Extensions
Occasionally, third-party Chrome Web Store extensions install with YouTube’s functionality, resulting in video latency or YouTube Audio Stuttering.
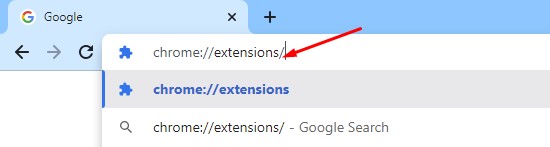
Open chrome://extensions/ in your Chrome browser to view the extensions. You must pay particular attention to extensions that have access to all web pages and are related to video and audio playing.
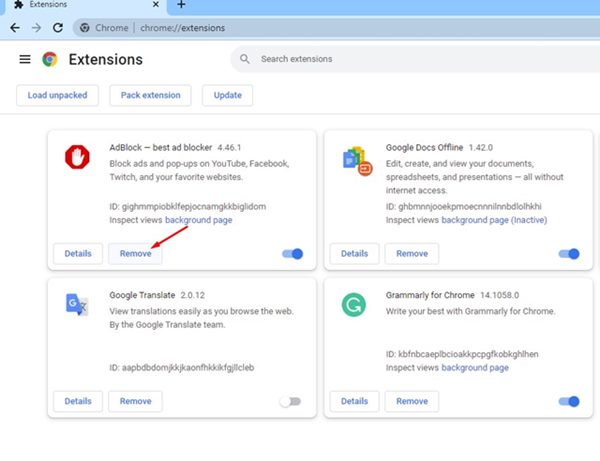
If you discover any dubious extensions on the list, you should remove them. Launch a new Incognito tab and play a YouTube video if you do not wish to remove any extensions. Attachments were not permitted to run in Chrome’s Incognito mode unless you granted permission.
Disable Hardware Acceleration In Chrome
Chrome’s Hardware Acceleration feature uses your GPU to increase video playing quality and performance for those unaware. However, if your computer lacks a strong GPU, you may experience video lag and audio stuttering. Therefore, it is best to disable the feature and check temporarily.
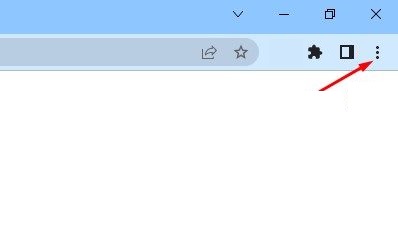
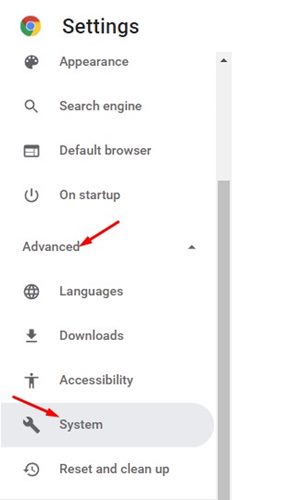
1 – Click the three dots located in the upper-right corner.
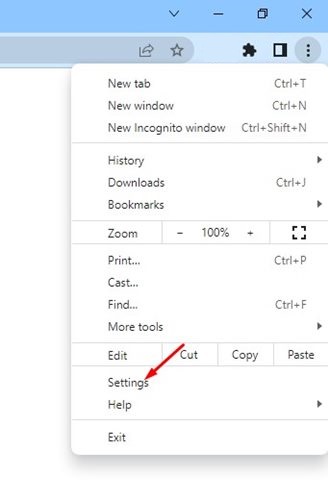
2 – From the list of available options, click Settings.
3 – Expand the Advanced section on the Settings page and choose System.
4 – Turn off the Use hardware acceleration when available switch on the System page.
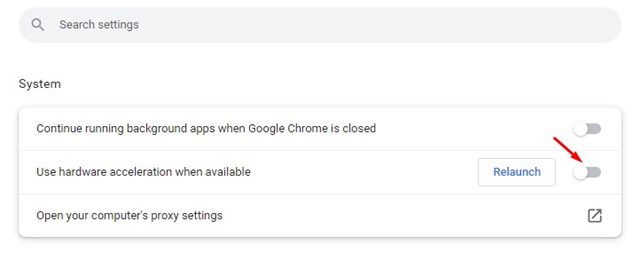
That is all! You are done. Restart the web browser and then play a YouTube video. The audio will no longer stutter.
Update Audio Driver
If YouTube audio continues to stutter after installing all browser-based fixes, you must investigate audio-related issues on your PC. The initial step should be to upgrade the audio driver.
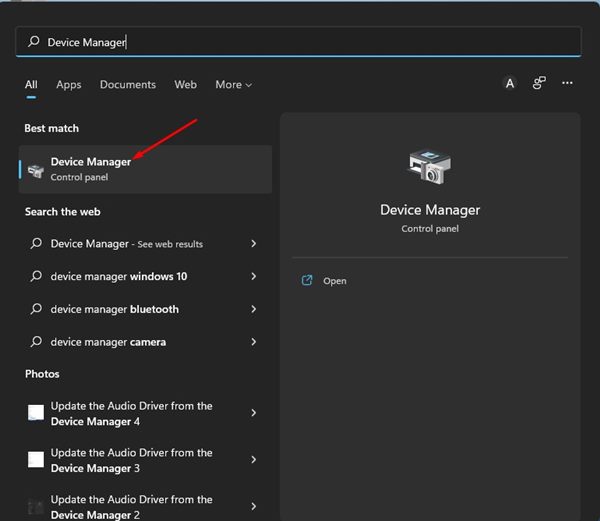
1 – Click the Windows Search button and enter Device Manager. Next, open Device Manager from the app list.
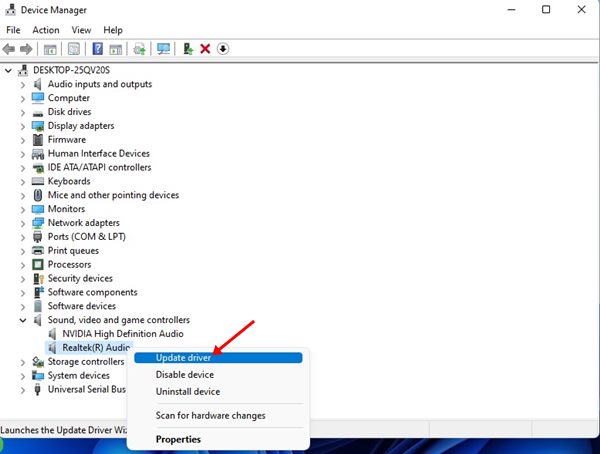
2 – Expand the Device Manager’s Sound, video, and gaming controllers option.

3 – Now, right-click the Sound driver and select Update driver.
4 – On the subsequent screen, there will be two options. Select Search for Drivers Automatically.
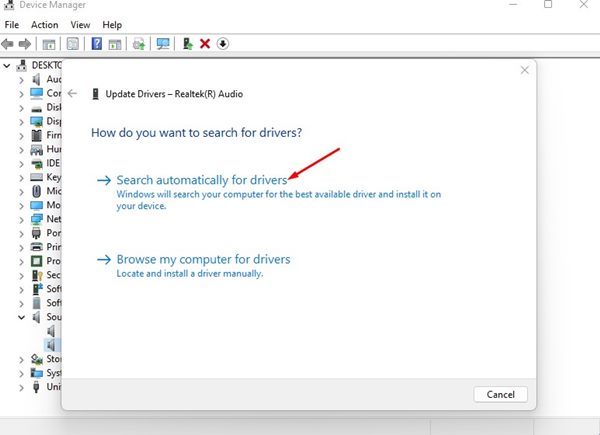
That is all! You are done. Now, follow the directions displayed on-screen to install the most recent version of the Audio driver. After updating, restart your computer and retest the YouTube audio.
Disable Audio Enhancements
Both Windows 10 and Windows 11 provide an Audio Enhancements option for customizing audio. Unfortunately, although the Windows Audio Enhancements increase audio quality most of the time, they occasionally cause issues when playing audio online. If you have enabled audio enhancements, it is thus best to disable the feature and check.
1 – Right-click the taskbar speaker and choose Sound Settings.
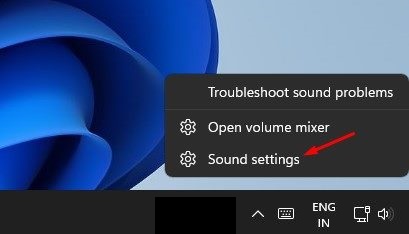
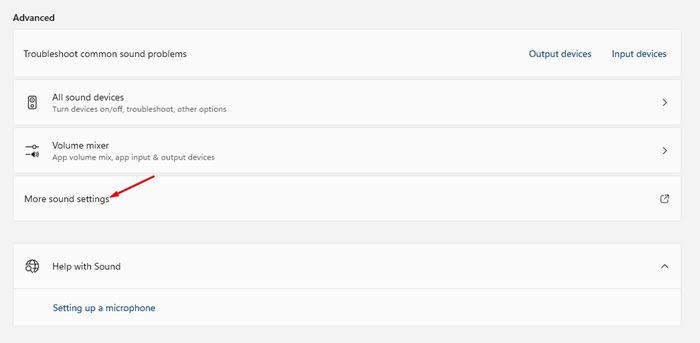
2 – On the Sound settings screen, scroll down and select Additional Sound Settings.
3 – Choose the speaker and click the Properties button in the Sound Window.
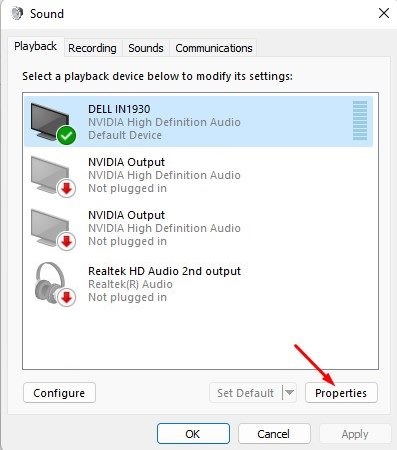
4 – On the Enhancements tab of the Speaker Properties, select Disable all enhancements.
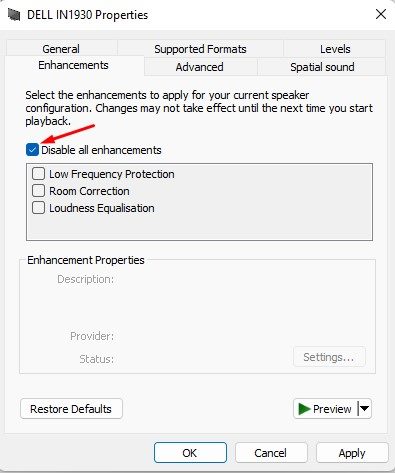
5 – Once complete, click the Apply button followed by the Ok button.
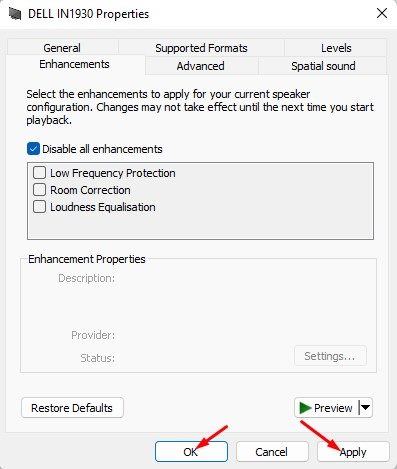
That is all! You are done. After disabling the audio enhancement, you must restart your computer. Play the YouTube video after the restart; the audio stuttering issue should be resolved.
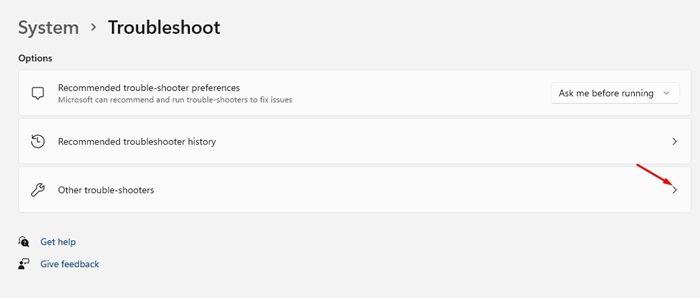
Run Audio Troubleshooter
Well, if disabling the audio enhancement does not work, you must try this alternative technique. Here, we’ll run the Audio Troubleshooter to find and fix audio-related issues on a Windows PC. Here is how to run Audio Troubleshooter on Windows 11.
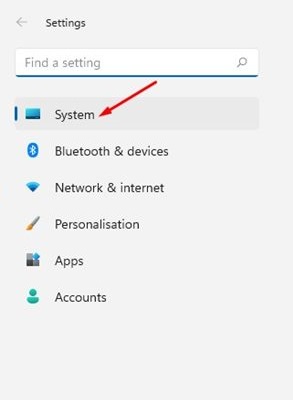
1 – Click the Start menu in Windows 11 and select Settings.

2 – On the left side of the Settings app, click the System tab.
3 – Click the Troubleshoot option on the right.
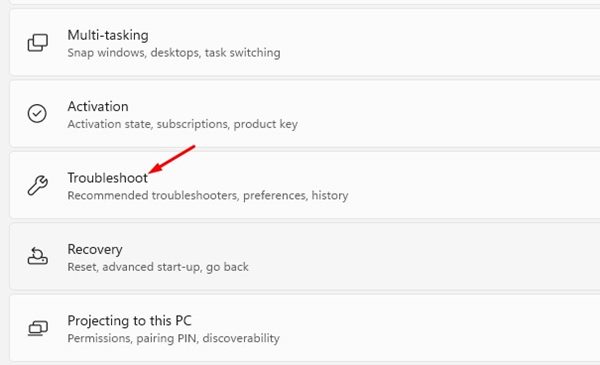
4 – On the subsequent page, select Other troubleshooting options.
5 – Click the Run button next to the audio player.
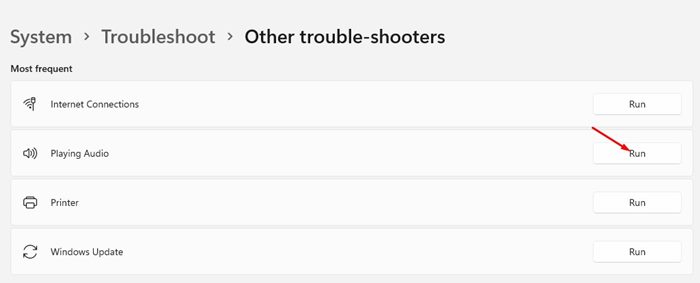
This will run the Windows 11 Audio troubleshooter on your computer. You must follow the on-screen directions to finish the procedure. The troubleshooter will require time to find and fix the problem.
Conclusion:
Consequently, the above are the most effective solutions to YouTube audio stuttering in Chrome on Windows 10 and 11. These easy methods would fix most audio-related issues on your computer, not only audio stutter. We are certain that these methods will select you in identifying audio-related issues.