

If you are running the most recent version of Windows 11, you are likely aware that the operating system includes several bugs and glitches. Yes, Microsoft is always working to enhance the operating system, but it will take some time until it is stable. For example, recent Chrome users on Windows 11 see an error message that states, “Allow Chrome to access the network in your firewall.” This error prohibits users from running the Google Chrome message browser. If you solely use Chrome to explore the web, you may find this error message quite bothersome and aggravating. However, if you see the ‘Allow Chrome to access the network in your Firewall’ error message and need assistance, you have reached the correct location.
How To Quickly Fix ‘Allow Chrome To Access The Network In Your Firewall’ Error Message?
This post will discuss the most effective methods to allow Chrome to access the network in your firewall. The procedures will be basic; adhere to the instructions provided below. Let’s check out.
Configure Windows Firewall
This procedure will add an exception to the Windows Firewall to provide Chrome access to the network firewall. Here are the steps you must take.
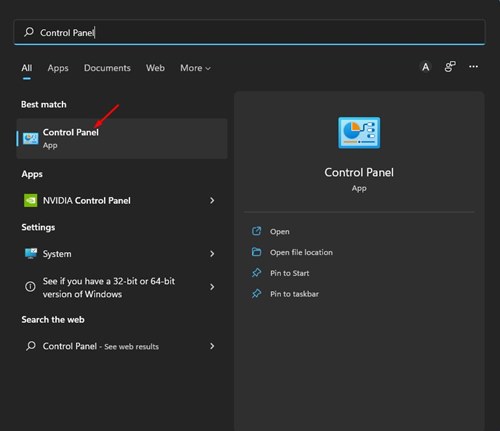
1 – Launch the Windows 11 search type and enter Control Panel. Next, click the Control Panel link inside the list.
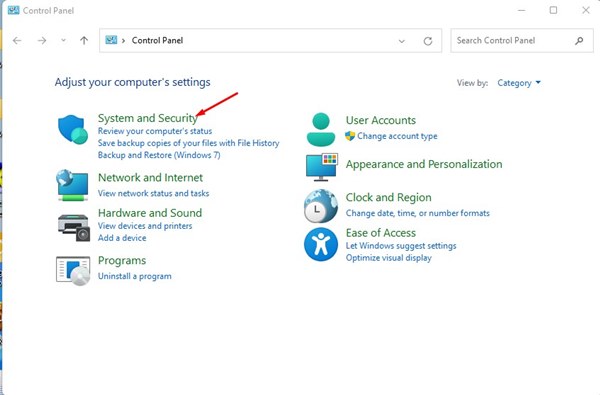
2 – Click the System and Security option under the Control panel.
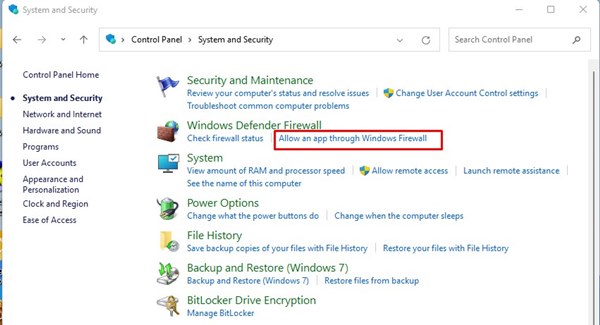
3 – Click the Windows Defender Firewall option on the System and Security screen.
4 – Click Allow an app or feature via Windows Defender Firewall on the left pane.
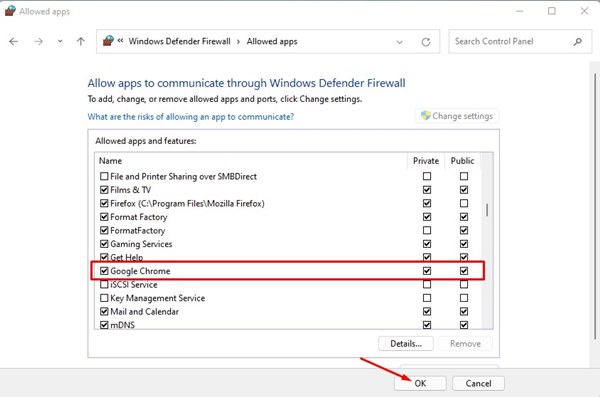
5 – On the Allowed Apps window, click the Change settings icon.
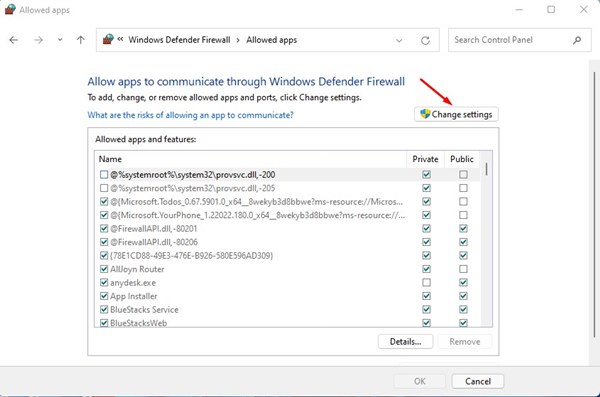
6 – Check the box next to Google Chrome for public and private use. After completion, click the Ok button.
That is all! You are done. This is how to configure Windows Firewall to allow Chrome network access on your computer.
Exclude Google Chrome For Windows Security
After setting Windows Firewall, you must make a few modifications to the Windows Security app to allow Chrome to access the internet. Here are the steps you must take.
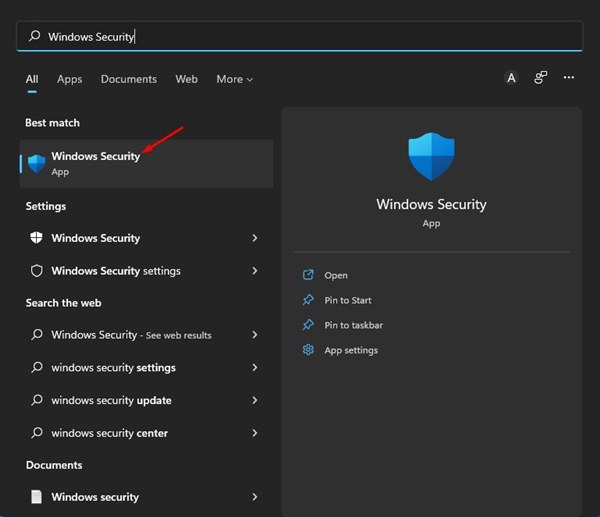
1 – Select Windows 11, then click Windows Security in the search type. Launch the Windows Security app next.
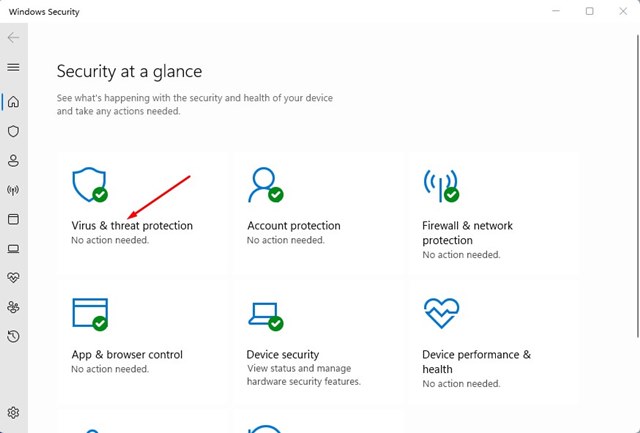
2 – Click the Virus & threat protection option in the Windows Security menu.
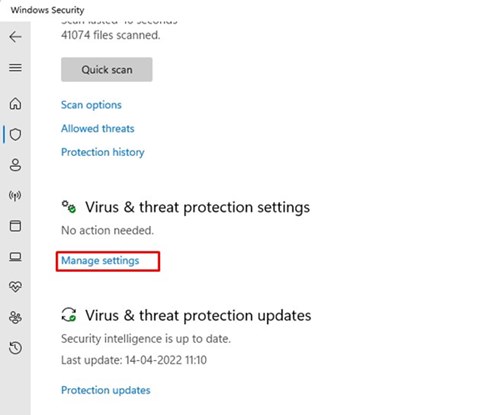
3 – To the right of the Virus & threat protection options, click the option Manage Settings.
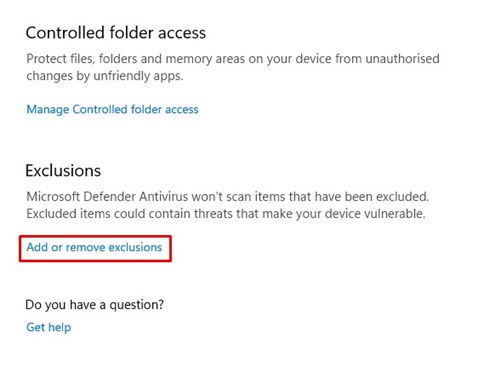
4 – Now, navigate the Exclusion page and click the Add or Remove exclusion option.
5 – Next, click the Add an exclusion button and choose the Folder option.
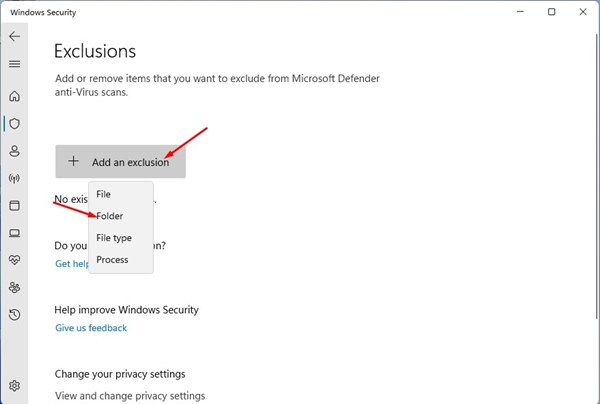
6 – Using the file selector, travel to the C:\Program Files (x86) folder and select the Google Chrome folder.
That is all! You are done. No longer will Windows Security prevent Chrome from connecting to your network.
The Bottom Line:
Therefore, these are the best ways to allow Chrome to access the network in your firewall. This post was helpful! Also, share with your friends. Please let us know in the comment area below if you’ve any questions about this.