

Currently, millions of people use Steam to download and play games online. The gaming platform has vastly developed over the past several years, and today hundreds of famous PC games may be played for free. The Steam desktop client provides players with several features, but it still has a few problems. Recent Steam user reports indicate that Windows 11’s Steam Client WebHelper has a high CPU usage. Consequently, this article is helpful if you also deal with problems owing Steam Client WebHelper high CPU usage. This article provides a detailed solution for fixing Steam Client WebHelper high CPU usage on the Windows 11.
What Exactly Is Steam Client WebHelper?
Steam Client WebHelper is the internal browser of the Steam Client that starts various background processes. In addition, the Steam Client WebhHelper enables access to the Steam Store, Game Library, and Community tab. Therefore, when you open Steam Client first after a restart, Steam Client WebHelper may significantly increase your CPU usage when it loads the Steam Store, Game Library, and Community page.
Typically, CPU usage decreases once all Steam components have loaded. Nonetheless, if the Steam Client WebHelper fails to set up the required display for the Steam Store game library, it will continue in the background and attempt to set up the display continuously. This causes CPU usage to skyrocket. Unfortunately, Windows 11 makes your PC susceptible to the Steam Client WebHelper CPU utilization issue. The good news is that you can quickly repair the problem without installing any third-party app.
How To Quickly Fix Steam Client WebHelper High CPU Usage?
Consequently, if you’re dealing with the Steam Client WebHelper High CPU usage in the Windows 11, you must implement the easy methods we’ve provided. Here’s how to fix quickly Steam Client WebHelper High CPU usage in Windows 11.
Disable Animated Avatars
Animated Avatars & Animated Frames is a function of the Steam Client for Windows. The Steam Client WebHelper handles the Animated Avatars function, and when it fails to load the Animated avatars, it generates high CPU usage on Windows 11. Therefore, you could fix the problem by disabling the Animated Avatars and Animated Avatar Frames.
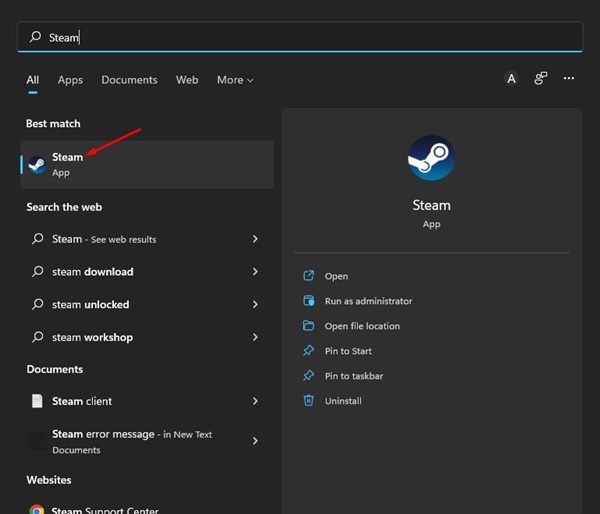
1 – Open Steam’s desktop client on your PC.
2 – Select View Friends List from the Friends option in the main menu.

3 – Click the Settings gear icon on the Friends List.

4 – Turn off ‘Enable Animated Avatars & Animated Avatar Frames in your Friends List and Chat’ option on the subsequent screen.

That is all! You’re done. After making modifications, restart the Steam client.
Disable Steam Overlay
If you continue to experience Steam Client WebHelper High CPU Usage, you must disable Steam Overlay. This is because WebHelper also attempts to load the Steam Overlay component of Steam’s user interface. High CPU usage is triggered if Steam Client WebHelper fails to load the Steam Overlay. This article describes how to disable the Steam Overlay.
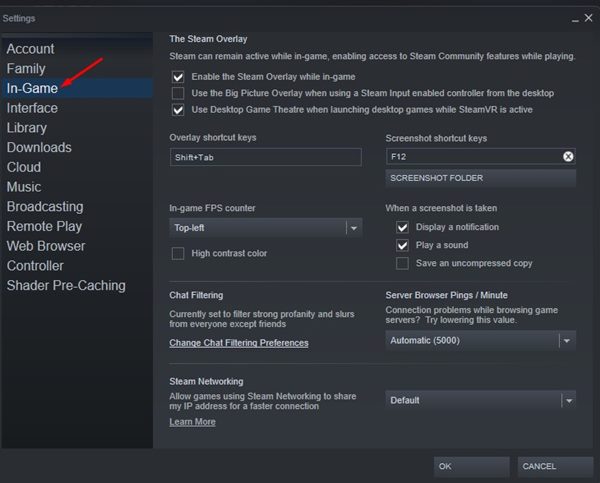
1 – Launch the Steam client on your PC. Click Steam > Settings next.

2 – On the right pane of the Settings Window, click the In-Game option.
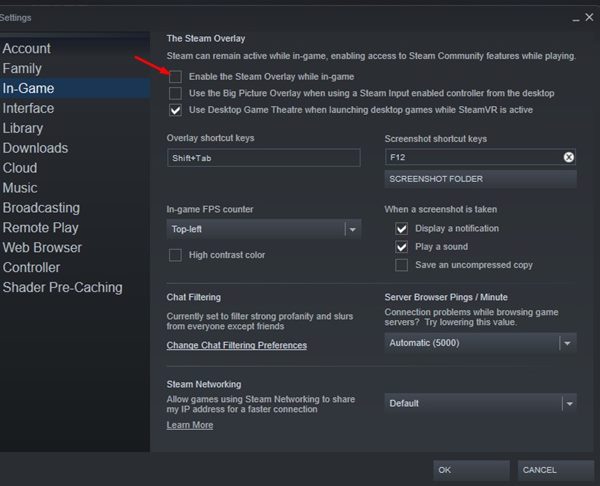
3 – Uncheck the ‘Enable the Steam Overlay while in-game’ option in the left pane. After finishing, click the Ok button.
That is all! You’re done. After making the modifications mentioned above, restart the Steam client.
Disable Other Visual Elements Of Steam Client
In addition to disabling the Steam Overlay, you may experiment with disabling a few additional Interface settings. Here are the few options you must disable to easily fix Steam Client WebHelper high CPU usage on the Windows 11.
1 – Launch the Steam Desktop client and navigate to Settings > Steam.
2 – Navigate to the Interface tab in the Settings Window.
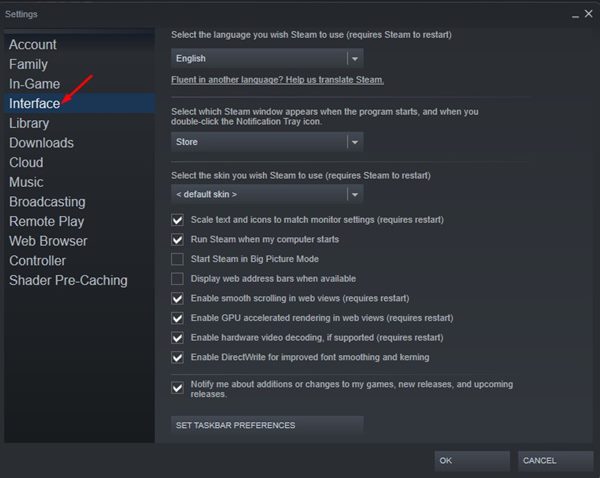
3 – Disable these 3 options in the right pane.
- Enable scrolling with ease in web views.
- Enable GPU-accelerated rendering for the web views option.
- Enable Hardware video decoding.
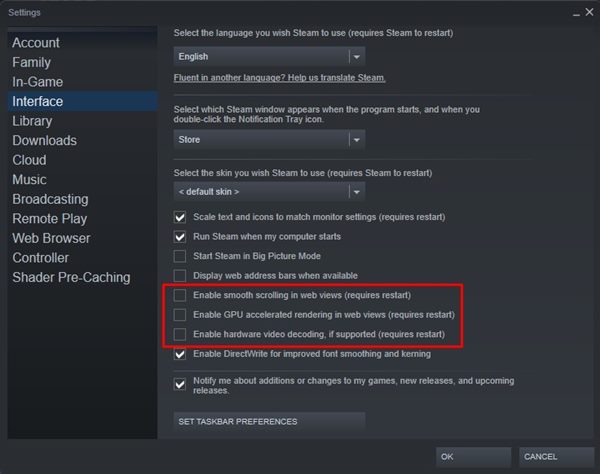
4 – You must uncheck the following three options to disable the features. After completion, click the Ok button.
That is all! You’re done. This will likely resolve Steam Client WebHelper High CPU usage on Windows-based computers.
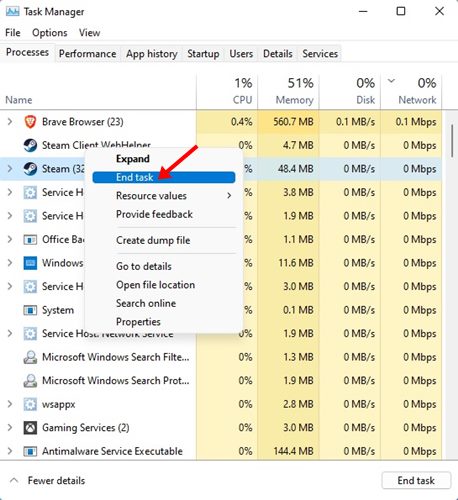
Run Steam Without WebHelper
Since the Steam WebHelper caused your Windows computer’s CPU usage to increase, you can disable the WebHelper entirely. If you disable this, several essential Steam visual features may not load, but it will increase your FPS in-game. Here is how to run Steam Without WebHelper.
1 – Exit the Steam client and associated processes using the Task Manager’s End Task command.
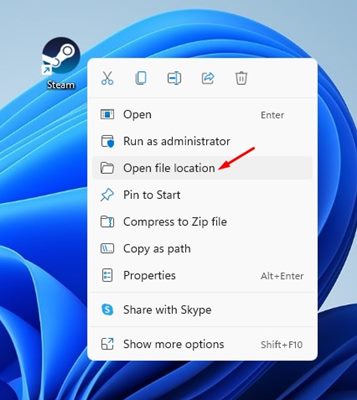
2 – Right-click the Steam shortcut on the desktop and choose Open File Location.
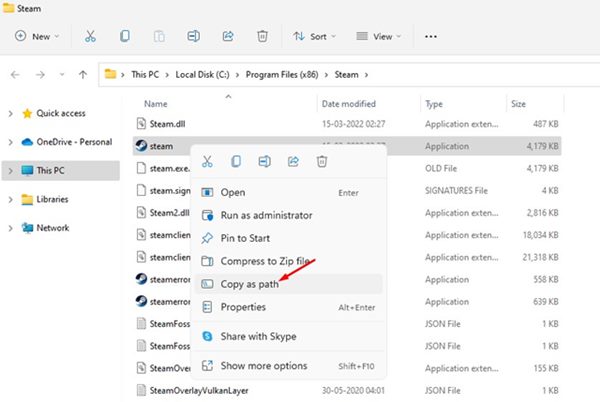
3 – Locate the steam.exe file in the Steam folder. Right-click on the steam.exe executable and choose the Copy as a path option.
4 – Now, hit the Windows key along with the R button. In the Run dialogue box, paste the file location you copied in the preceding step and add -no-browser +open steam://open/minigameslist.
5 – The entire command will look like this:
"C:\Program Files (x86)\Steam\steam.exe" -no-browser +open steam://open/minigameslist

6 – Click the Ok button on the Run dialogue box after you finish.
That is all! This will run the Steam Desktop client without the WebHelper on your PC.
Reinstall Steam Client
If none of the above methods fix the problem, you must reinstall the Steam Client. Perhaps Steam Client WebHelper is using an excessive amount of CPU owing to wrong settings or faulty Steam files. If all else fails, it is advisable to reinstall the Steam desktop client. This may fix the Steam Client WebHelper high CPU usage on the Windows 11.
Conclusion:
These are the few most effective methods for resolving Steam Client WebHelper high CPU usage on Windows. Although Windows 11 was used to show the methods, you may use the same methods on Windows 10 to fix the problem.